Showing posts with label diy. Show all posts

Saturday, February 25, 2012

Rainbow Baby Shower Decorations

I've spent this last couple of weeks cutting and gluing and painting and planning to throw a friend of mine a baby shower for her very first baby. My friend hasn't found out the sex of the baby so I decided to go with a rainbow theme for the shower. I love making my own decorations so this was the perfect opportunity to whip out the paint, scissors and glue and start making. I thought I'd share, with you, a little bit of what I made. 


If you follow me on instagram or twitter you may have already seen the food and more importantly the cake that I make for the baby shower, but if not you'll just have to wait till tomorrow for that post. 

Sunday, January 29, 2012

DIY: Spike phone case


This DIY project has been along time coming. I had seen this phone case on Bleach Black and thought it was pretty spunky. However when I saw this tutorial I decided that I should have a go. So I headed straight to ebay for supplies. Glorious ebay. I decided to go for a bit of a less severe spike then the other two cases and thought that gold would give it a good look.


What You'll Need:


  • Screw in spikes (I got mine from ebay)
  • Silicone phone case (ebay again, I chose black but you can use any colour)
  • Safety pin
  • Metallic pen
  • Pig stabber (I didn't know what it was called and was kinda shocked when I found out) 


 I was going to do a whole step by step process for you here but the truth is that this DIY doesn't even have that many steps, it isn't really hard at all. 

First have a play with your spikes and see how you want to arrange them on your case. I decided to go with about 1.5cm between each spike. Next you have to use your metallic pen to mark out where you want the spikes. 

Next I used a safety pin to make a small whole where the first spike was going through, then I used the 'pig stabber' to go through this whole and make it a little bit bigger. You need to be careful not to rip the silicone when you are doing this part. If you don't have a 'pig stabber' you can use anything, like a bottle opener or metal skewer. 

Finally put the bottom (screw) part of the spike through the silicone case then twist the top (spike) part on until it is tight. Now Repeat this several times until all your spikes are in place.  


 Ta- da My finished product:


 p.s. Did that even make sense? 

Thursday, October 27, 2011

DIY inspiration - Cut out shirt


So I've been loving the cut-out shirt craze that has been going around lately. I've seen a couple of DIY's (and decided to do one 10mins before I was going out one day)and I really want to give it a proper go. 

I'm on prac at the moment, teaching in a Kindy class, so DIY has kind of taken a backseat to painting and lesson planning. Oh lesson planning. Tomorrow we are reading a factual book about birds and making peacock feathers for art. So I've spent the afternoon drawing a peacock. I shall show you a picture when it's finished! 

Anyway I picked up this really awesome turquoise shirt from this new Salvos I found the other day, and I am making time to do this DIY this weekend. No matter what. So keep an eye out! 

xx

p.s. Which cut out style do you like best? 

Tuesday, October 4, 2011

Procrastination nation

EVIL TWIN - The Righteous-Few-tunic - $158


Inspiration for this weekends DIY project. Went to the thrift store the other day and got some nice shirts to try this out on. I will make sure to post about it before next week. I have been meaning to do the whole cut out shoulder thing on a shirt for a long time but haven't got round to it because of uni or other things. I did it the other day on a t-shirt in about 10 minutes because I decided that's what I wanted to wear whilst my best friend was on the way to pick me up. 

Also made some yummy vanilla and passionfruit cupcakes yesterday here is a sneak peek. I shall post the recipe and more photos later this week when I have finished this yucky assignment. 


Well I best get back to this assignment. Be sure to keep an eye out for this DIY and recipe in the next couple of days

Tuesday, September 13, 2011

Inspiration: Jordan of Oh Happy Day!

One of the main influences on me actually deciding to start this blog after thinking about it for a little while was me discovering Oh Happy Day! Jordan the lady that runs this site in my opinion is amazing. After seeing one of her pinata DIYs on pin-interest I found myself sitting at my laptop going over every single post this lady has ever made!! 

I found the website in the week before my best friends Ilsa's 21st birthday party. In the next week after finding the website I completed 3 of Jordan's DIYs for Ilsa's party. 

The pinata was probably the most time consuming and I ambitiously decided to make a large 21 and have an intricate colour scheme going on. It also saddened me a bit that after all my hard work it was just going to be "smashed the shit out of" But boy did we have fun doing that!! 

Me with the pinata 


We had already wanted to do a photo booth at the party just for fun cos we have always loved taking photos but when I found Jordan's photbooth props it just cemented the idea!! The booth was a hit at the party that's for sure, and I also think it will be a great memory for Ils. 


I even came up with the idea to have Ilsa over earlier in the week and take photo booth photos on our own and then I turned the photos into a present for her (along with a Kings of Leon shirt). We had to put Ils on a piece of wood cos shes a shorty and at one stage she fell off and almost ended up with a stump of wood in places it shouldn't be. 


And the third DIY was a simple popout card tutorial. For some reason I have always struggeled with the concept of pop up cards but Ilsa and I always give each other very creative cards so finding this tutorial was amazing! I forgot to take a photo of the card before I gave it to her(pretty much because I was working on it right until the minute she came to pick me up to go to the hotel the day of her party) so I'll just show you the card she gave me this year instead.  

We like Kings of Leon incase you didn't notice

The main point of this is not only to show you Jordan's site but also to thank her for being such an amazing source of inspiration for me!! 


Hollee xx

Monday, September 12, 2011

Scissors: Inspiration and projects

Over the weekend, I guess partly because I didn't have my laptop my mum and I finally got around to cleaning our the spare room and turning it into my craft room (pictures to follow). I'm really happy with how it turned out, all my craft and DIY supplies are nicely organised in the cupboard and the sewing machine is now easily accessible and not in the corner somewhere. 

Anyway this new craft room has finally allowed me a space all of my own to carry out my projects. So in honor of that I thought I'd show you some of my upcoming projects. 


I found  the top two inspirations in a folder from my old computer called ideas, I guess I've always had a DIY mind, so I'm not sure who to credit them too. They are  Both pretty simple DIYs its just a matter of me getting the things I need to do them. Im thinking for the shirt I will make it a combination of sewing on the tulle for the skirt and using fabric paint to paint the legs. 

The bottom two inspirations are both projects I've seen some of my favourite bloggers do. Ages ago I found this awesome jumper from a  thrift store, its a qwirky green and black pattern, problem was that it had a really high neck and when I wore it I felt like it was strangling me. I had thought of cutting it into a V-neck but wasn't 100% sure thats what I wanted to do but then I saw how lionstigersandfashionohmy made one of her jumpers into a cardigan, um genius idea in my opinion!

As you already know my laptop went in over the weekend to get repaired (I got it back today and they replaced the harddrive and transferred all everything from my old harddrive to the new one, I was over the moon I didnt have to back it up myself) so I thought maybe my laptop deserved some TLC. I saw this tutorial on sweet verbena a little while back, and now its just a matter of going to spotlight to get some leather to do it. 


Monday, September 5, 2011

Scissors: Jewellery is one of my weaknesses


I'll set the scene first. My necklaces used to hang off the picture rail and always get tangled, my rings used to get thrown where ever they were taken off and my earrings were lucky to find their little box where they were finished with.
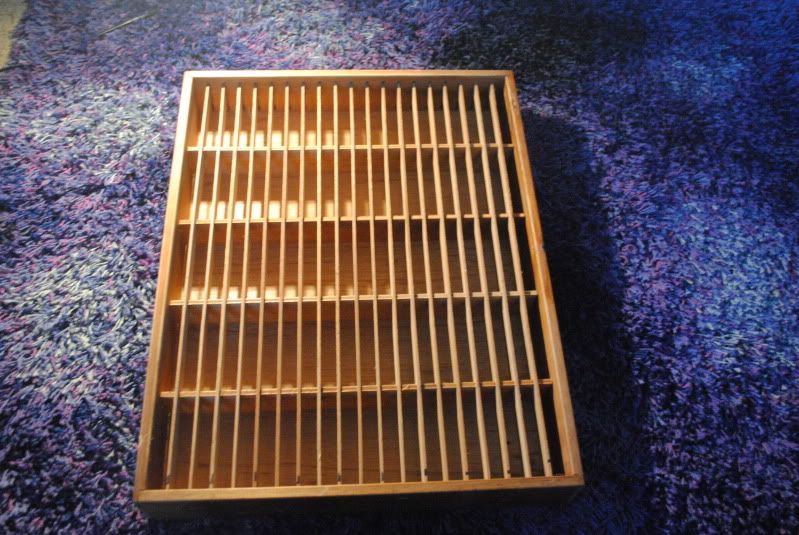
I had seen this DIY on a couple of sites and have been waiting to find the perfect frame for it. I found this, what I assume is a spice rack, at the markets one morning and was so excited to get home and try it out for myself. 
Yes that's my beautiful purple shag carpet in the background. 


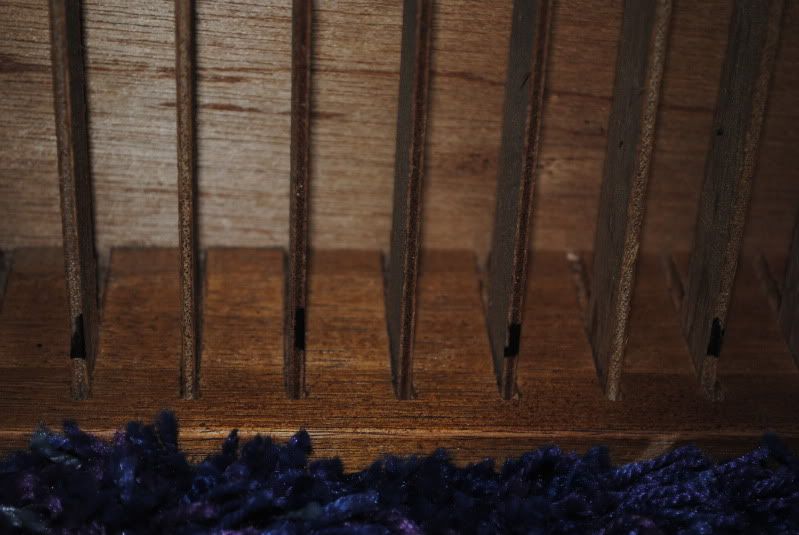
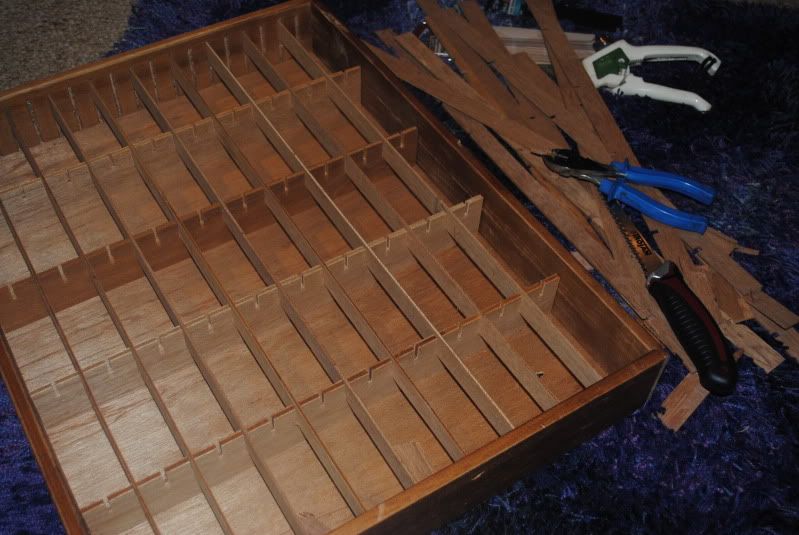
The shelves were a bit small to fit any jewellery in so first up was to cut every second column out. So you don’t get mixed up its a good idea to mark which shelves you are cutting out with a black marker. I ended up using tin snips which easily cut the column making it a simple job to just pull out the shelve.  


Next up it was time to spray paint the Shelve. To keep in theme with my room I went for black spray paint and it wasn’t difficult to get a good finish. I forgot to take a photo of the shelves after spray painting, but I’m sure you can use your imagination to see what it looks like. 

Putting in the hooks was the hardest and most tedious part of this whole DIY project. It took so long for me  my mum to get them all in, I just couldn’t get my the hooks turning the right way. It makes it alot easier if you use a screwdriver or letter opener to start the wholes off before twisting the hooks in. 

And the last thing to do is hand your jewellery up. Guess I will just have to buy more to fill it up. 

Ta daaa

xx

Sunday, September 4, 2011

What is this?

Scissors Shoes and Spoons. 

This is just a place for me to document three of my favourite things. Do It Yourself, Fashion and cooking. 

I constantly frequent fashion and DIY blogs and some of my favourite and inspirations include apair-andaspareohhappyday and lovemaegan